고정 헤더 영역
상세 컨텐츠
본문
Vue3와 Vite, Vitest unit test, cypress e2e test, storybook과 chromatic의 시각화 테스트를 구현하고
github ci로 자동화를 해보도록 한다
Vite를 활용해서 Vue3 프로젝트를 생성하고 테스트를 구성해보자
패키지매니저는 pnpm을 사용한다

Vite
Vite, 차세대 프런트엔드 개발 툴
ko.vitejs.dev
Vite 프로젝트는 다음과 같이 생성하였다

프로젝트명은 ci_tutorial으로 하였고 framework는 Vue를, variant는 create-vue를 사용하여 custom으로 환경을 구성하였다
기본적으로 Typescript를 사용하였으며 추후 확장을 위해 JSX support, router와 pinia를 모두 포함하였고, Vitest로 unit test를 cypress롤 E2E testing을 진행하도록 추가하였다 그리고 ESLint롸 Prettier도 추가 해주었다
이후 나오는 메시지에 맞게 pnpm install 후 pnpm dev를 하면 프로젝트가 생성된다

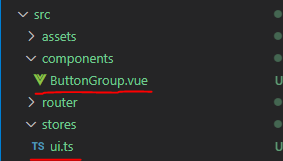
이후 components, stores에 불필요한 파일을 삭제하고 ButtonGroup.vue와 ui.ts 파일을 추가해주고 다음과 같이 작성해주었다
// components/ButtonGroup.vue
<script lang="ts" setup>
import { ref } from 'vue'
import type { PropType } from 'vue'

defineProps({
  buttons: {
    type: Array as PropType<Array<{key: string, text: string}>>,
    required: true
  },
})

const emit = defineEmits<{
  // emit의 형태를 지정해줘야 한다
  (e: 'updateActive', key: string): void
}>()

const selected = ref('') // 선택된 버튼의 key

function updateActive (key: string|undefined) {
  // button 클릭시 active 업데이트
  if (key) selected.value = key
  emit('updateActive', selected.value)
}
</script>

<template>
  <div class="button-group-container">
    <div class="button-group">
      <button
        v-for="(item, index) in buttons"
        :key="index"
        :class="{active: item.key === selected}"
        @click="updateActive(item.key)"
      >
        {{ item.text }}
      </button>
    </div>
  </div>
</template>
<style>
  .button-group {
    display: flex;
  }
  .button-group button {
    border: 0;
    padding: 0.25rem 0.5rem;
    border-top: 1px solid #ccc;
    border-bottom: 1px solid #ccc;
    transition: background-color 0.1s;
    cursor: pointer;
  }
  .button-group button.active {
    color: blue;
  }
  .button-group button:hover {
    background-color: rgb(240, 240, 240);
  }
  .button-group button + button {
    border-left: 1px solid #ccc;
  }
  .button-group button:first-child {
    border-left: 1px solid #ccc;
    border-top-left-radius: 0.25rem;
    border-bottom-left-radius: 0.25rem;
  }
  .button-group button:last-child {
    border-right: 1px solid #ccc;
    border-top-right-radius: 0.25rem;
    border-bottom-right-radius: 0.25rem;
  }
</style>
// stores/ui.ts
import { ref } from 'vue'
import { defineStore } from 'pinia'
export const uiStore = defineStore('ui', () => {
const ui = ref('')
function setUi(value: string) {
// value가 전달되면 ui의 값을 value로 변경
ui.value = value
}
return {
ui,
setUi
}
})
이후 HomeView.vue와 App.vue, router/index.ts 파일을 다음과 같이 수정해주었다
// views/HomeView.vue
<script setup lang="ts">
import { uiStore } from '@/stores/ui'
import ButtonGroup from '@/components/ButtonGroup.vue'

const store = uiStore()

const buttons = [
  {key: 'button1', text: '버튼1'},
  {key: 'button2', text: '버튼2'},
  {key: 'button3', text: '버튼3'},
  {key: 'button4', text: '버튼4'},
]

function updateActive (key: string) {
  // updateActive가 전달되면 store에 ui 업데이트
  store.setUi(key)
}
</script>
<template>
  <div>
    <h1>Home</h1>
    <h2>{{ store.ui }}</h2>
    <ButtonGroup
      :buttons="buttons"
      @updateActive="updateActive"
    />
  </div>
</template>
// App.vue
<script setup lang="ts">
import { RouterView } from 'vue-router'
</script>
<template>
<div>
<RouterView />
</div>
</template>// stores/ui.ts
import { ref } from 'vue'
import { defineStore } from 'pinia'
export const uiStore = defineStore('ui', () => {
const ui = ref('')
function setUi(value: string) {
// value가 전달되면 ui의 값을 value로 변경
ui.value = value
}
return {
ui,
setUi
}
})다음과 같이 간단한 예제가 완성되었다

이제 테스트코드를 추가한다
Vitest
Next generation testing framework powered by Vite
vitest.dev
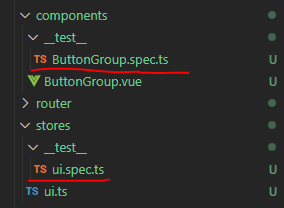
vitest가 인식할 수 있도록 [__test__]/*.spec.ts 형태로 unit test를 작성하도록 한다
// components/__test__/ButtonGroup.spec.ts
import { describe, it, expect } from 'vitest'
import { shallowMount } from '@vue/test-utils'
import ButtonGroup from '@/components/ButtonGroup.vue'

describe('ButtonGroup', () => {
  const buttons = [
    { key: 'button1', text: '버튼1' },
    { key: 'but2ton', text: '버2튼' },
    { key: '3button', text: '3버튼' }
  ]

  it('buttons props에 전달된 버튼이 올바르게 표시되는지 확인', () => {
    const wrapper = shallowMount(ButtonGroup, {
      props: {
        buttons: buttons
      }
    })
    const button = wrapper.findAll('button')
    expect(button.length).toBe(3)
    expect(button[0].text()).toBe('버튼1')
    expect(button[1].text()).toBe('버2튼')
    expect(button[2].text()).toBe('3버튼')
  })

  it('버튼 클릭시 emit이 올바르게 동작하는지 확인', () => {
    const wrapper = shallowMount(ButtonGroup, {
      props: {
        buttons: buttons
      }
    })
    const button = wrapper.findAll('button')
    button[0].trigger('click')
    expect(wrapper.emitted().updateActive[0]).toContain('button1')
    button[1].trigger('click')
    expect(wrapper.emitted().updateActive[1]).toContain('but2ton')
    button[2].trigger('click')
    expect(wrapper.emitted().updateActive[2]).toContain('3button')
  })
})
// stores/__test__/ui.spec.ts
import { describe, it, expect, beforeEach } from 'vitest'
import { setActivePinia, createPinia } from 'pinia'
import { uiStore } from '@/stores/ui'
describe('uiStore', () => {
beforeEach(() => {
setActivePinia(createPinia())
})
it('ui의 값을 변경', () => {
const store = uiStore()
store.setUi('fooo')
expect(store.ui).toBe('fooo')
})
})
이후 테스트가 문제없는지 실행해본다

그리고 cypress로 테스트할 수 있게 e2e 테스트도 작성해준다
https://docs.cypress.io/api/table-of-contents
Table of Contents | Cypress Documentation
Commands
docs.cypress.io
cypress가 자동으로 인식할 수 있게 root에 cypress/e2e/*.cy.ts 형태로 e2e 테스트를 작성해주도록 한다

// cypress/e2e/home.cy.ts
describe('Home', () => {
  beforeEach(() => {
    cy.visit('/')
  })

  it('h1 태그의 텍스트를 검사한다', () => {
    cy.contains('h1', 'Home')
  })

  it('h2 태그는 기본적으로 비어있다', () => {
    cy.get('h2').should('have.text', '')
  })

  describe('button의 액션을 검사한다', () => {

    it('button 클릭시 active 클래스가 적용된다', () => {
      cy.get('button').eq(0).click()
      cy.get('button').eq(0).should('have.class', 'active')
      cy.get('button').eq(1).click()
      cy.get('button').eq(1).should('have.class', 'active')
      cy.get('button').eq(2).click()
      cy.get('button').eq(2).should('have.class', 'active')
      cy.get('button').eq(3).click()
      cy.get('button').eq(3).should('have.class', 'active')
    })

    it('button 클릭시 해당 key로 h2의 값이 변경된다', () => {
      cy.get('button').eq(0).click()
      cy.get('h2').should('have.text', 'button1')
      cy.get('button').eq(1).click()
      cy.get('h2').should('have.text', 'button2')
      cy.get('button').eq(2).click()
      cy.get('h2').should('have.text', 'button3')
      cy.get('button').eq(3).click()
      cy.get('h2').should('have.text', 'button4')
    })

  })
})
이후 테스트가 문제없는지 실행해본다

cypres는 테스트 전에 빌드가 선행되어야한다

* css hover는 테스트하지 않는다
https://github.com/cypress-io/cypress/issues/7952
How to test styles changes on hover with cypress · Issue #7952 · cypress-io/cypress
I want to test styles when hover on element but it doesn't work: This is my test code: it("Table rows hover styles should be correct", () => { cy.get("table>tbody>tr").each(($el, index, $list) => {...
github.com
이제 chromatic 이전에 storybook을 우선 구성해보도록 한다

https://storybook.js.org/docs/vue/get-started/install/
Install Storybook
Storybook is a frontend workshop for building UI components and pages in isolation. Thousands of teams use it for UI development, testing, and documentation. It’s open source and free.
storybook.js.org
document를 참고해서 스토리북을 설치한다

이후 stories 디렉토리에 불필요한 내용을 모두 삭제하고 다음과 같이 생성해준다

// stories/ButtonGroup.stories.ts
import ButtonGroup from '@/components/ButtonGroup.vue'

import type { Meta, StoryObj } from '@storybook/vue3'

const meta: Meta<typeof ButtonGroup> = {
  component: ButtonGroup,
  parameters: {
    docs: {
      description: {
        component: '그룹화된 버튼을 표시하고 active로 활성화된 버튼을 표현하는 컴포넌트\n\nMobile은 항목 내에서 확인가능'
      },
    },
  },
  tags: ['autodocs'],
  argTypes: {
    buttons: {
      control: 'object',
      description: '버튼 그룹에 표시할 버튼들의 정보를 담은 배열\n\nkey는 버튼을 구분할 수 있는 고유한 key값, text는 버튼에 표시할 텍스트',
    },
    // @ts-ignore
    updateActive: {
      action: 'updateActive',
      description: '변경된 active값을 부모 컴포넌트에 전달하는 이벤트',
      control: 'function',
      table: {
        type: {
          summary: 'defineEmits',
        }
      }
    },
  },
}
export default meta

type Story = StoryObj<typeof ButtonGroup>
export const Primary: Story = {
  render: (args) => {
    return {
      components: { ButtonGroup },
      setup() {
        return { args }
      },
      template: '<ButtonGroup v-bind="args" />',
    }
  },
  args: {
    buttons: [
      { key: 'day', text: '일간' },
      { key: 'week', text: '주간' },
      { key: 'month', text: '월간' },
    ],
  },
}

현재 이 포스팅 작성 시점에서 defineEmit하는 updateActive의 경우는 타입을 지정해놓으면 생성이 되나 그 외 액션 또는 description을 올바르게 지정할 수 없는 문제가 있다
우선 ts-ignore를 설정하여 타입스크립트 문제를 방지해두고 추후 업데이트를 추적하여 개선되는지 확인하여야 한다
(storybook 문제가 아니라 ts와 vs-code 익스텐션인 volar의 복합적인 문제라 언제 수정될지 모름)
https://github.com/storybookjs/storybook/issues/23079
[Bug]: Vue3 Automatic inferenced argTypes don't work well · Issue #23079 · storybookjs/storybook
Describe the bug I'm using latest storybook whose verison is 7.0.20. I'm using vite+vue preset. I have a Component, and I wrote stories for it, but the automatic inferenced argTypes don't work well...
github.com
여기까지 진행하였다면 까먹지 말고 레포지토리에 commit해주도록 하자

이제 chromatic을 사용하여 storybook을 게시하고 시각화 테스트를 추가해보자
Automatically review, test, and document Storybook
Chromatic automates visual & interaction tests for Storybook. Connect CI/CD and Figma workflows to streamline stakeholder sign-off. Generate versioned component docs.
www.chromatic.com
chromatic에 가입하고 새로운 프로젝트를 생성해준다

Choose from GitHub를 선택하여 깃헙 레포지토리를 기반으로 프로젝트를 추가해준다

이후 chromatic을 생성하고 storybook을 publish 하라는 내용이 나오니 안내대로 따라해준다
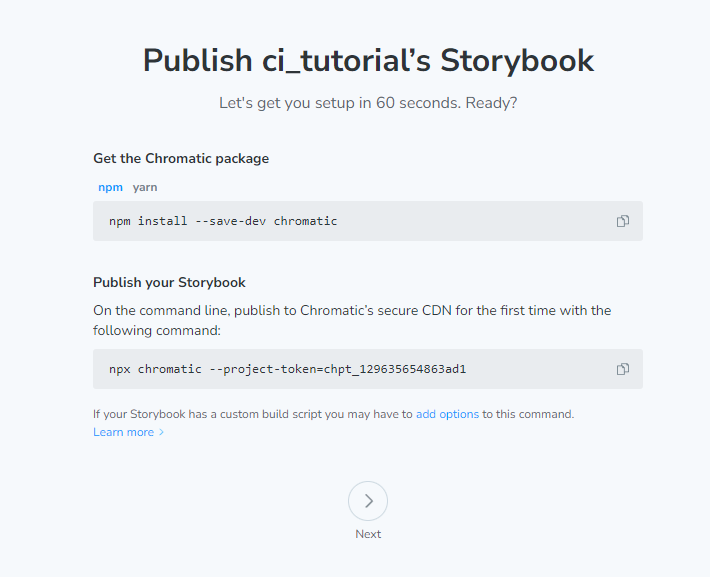
안내에는 npm과 yarn만 있지만 pnpm으로 설치해도 무방하다

이후 storybook을 발행해준다
앞서 커밋을 하지 않았다면 에러가 나니 커밋하고 발행하도록 한다

이후 ui를 변경하여 change를 감지하라는 튜토리얼이 나오는데 안내대로 진행해준다

우선 변경 감지를 위해 stories/ButtonGroup.stories.ts 의 버튼만 변경해준다

이후 안내대로 재 발행해준다면

ui가 변경된 내용을 확인할 수 있고 투표도 하여 시각화 테스트를 진행할 수 있게된다
이로써 프로젝트의 모든 구성이 끝났다 다음에는 github actions로 CI 를 구성하여 테스팅 자동화를 해보도록하자
'Vue & Nuxt' 카테고리의 다른 글
| Vue3, unit test, e2e, chromatic github ci구성(2) - ci (0) | 2023.10.19 |
|---|---|
| Nuxt 직접로그인, 소셜로그인 구현하기 (Nuxt-auth) (1) | 2023.06.15 |
| Nuxt.js로 openai api 연동하여 slack GPT채팅 만들기(4) - 대화 저장 (0) | 2023.03.30 |
| Nuxt.js로 openai api 연동하여 slack GPT채팅 만들기(3) - nuxt, slack, gpt연동 (0) | 2023.03.26 |
| Nuxt.js로 openai api 연동하여 slack GPT채팅 만들기(2) - gpt 연동 (0) | 2023.03.26 |


댓글 영역