고정 헤더 영역
상세 컨텐츠
본문
목적
이번 포스팅에는 canvas에 객체를 삽입하는 기능을 만들도록 하자
이때 특정 위치에 객체를 생성해버리면 크기조정을 다시 해야하기 때문에 드래그로 생성하도록 하자
이번 포스팅에서 만들 내용은
- fabric.js의 기본 클래스인 Rect, Ellipse, Triangle, IText을 사용하고 커스텀 도형은 Polygon를 사용한다
- 버튼을 클릭하여 객체를 준비하고 드래그하여 캔버스에 그린다
- 객체를 그리고 mouse up 순간 새로 그려진 객체를 선택한다
- 객체의 선굵기, 선색깔, 채움색깔을 선택 혹은 변경할 수 있다
버튼 -> 드래그 -> 종료 순서를 반복해야하기 때문에 shape는 클래스로 작성을 하고
이 포스팅에서는 static, private 없이 심플하게 작성해보자
Class
interface와 class의 constructor, 사용될 변수를 선언하자
variable, interface
const polygonPointArray = { // shape 폴리곤 배열
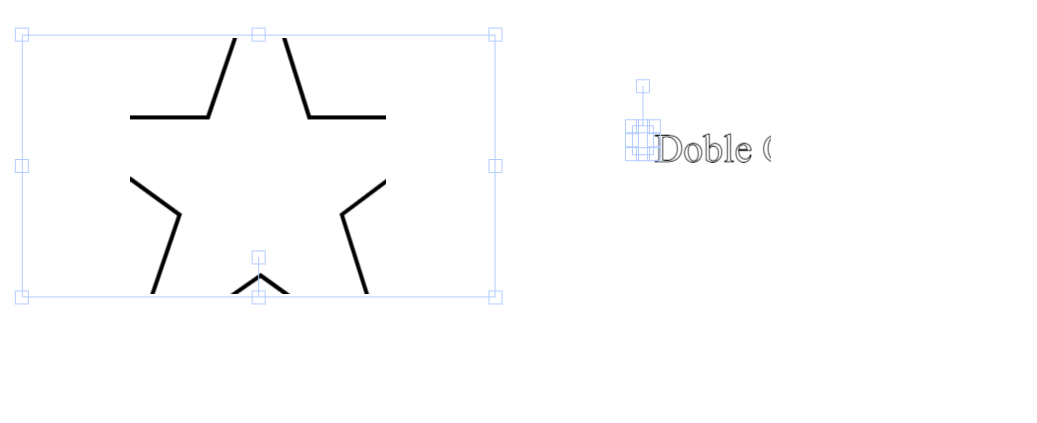
star: [{x: 80, y: 14},{x: 67, y: 52},{x: 27, y: 52},{x: 60, y: 76},{x: 47, y: 114},{x: 80, y: 91},{x: 112, y: 114},{x: 100, y: 76},{x: 132, y: 52},{x: 92, y: 52}]
}
type ShapeTarget = 'rect'|'ellipse'|'triangle'|'star'|'text' // 생성대상
interface ObjectOptions {
strokeWidth?: number // 선굵기
stroke?: string // 선색깔
fill?: string // 면색깔
}
const canvas: fabric.Canvas = new fabric.Canvas('canvas')폴리곤에 사용될 배열을 먼저 선택해주도록 한다
이 포스팅에는 예제로 star만 사용된다
배열에 각 point의 좌표를 지정하면 선과 면을 생성해준다
http://fabricjs.com/docs/fabric.Polygon.html#initialize
JSDoc: Class: Polygon
List of attribute names to account for when parsing SVG element (used by `fabric.Polygon.fromElement`) keeps the value of the last hovered corner during mouse move. 0 is no corner, or 'mt', 'ml', 'mtr' etc.. It should be private, but there is no harm in us
fabricjs.com
type은 shape 생성 대상을 선언해주고 interface는 strokeWidth, stroke, fill을 선언해준다
그리고 이전 포스팅과 같이 canvas도 선언해주도록 한다
initializer
class Shape {
  canvas: fabric.Canvas // 캔버스
  shapeTarget: ShapeTarget|null = null // 그리기대상
  shapeMode = false // 그리기모드 여부
  drawing = false // 그리기중인지
  startX = 0 // 시작좌표 x
  startY = 0 // 시작좌표 y

  strokeWidth = 1 // 선굵기
  color = { // 색상 object
    fill: '#ffffff',
    stroke: '#000000'
  }

  target: fabric.Object | null = null // 그려질 객체 대상

  constructor(canvas: fabric.Canvas) {
    this.canvas = canvas
  }
}
class에 필드를 선언해준다
cavnas에 초기화시 fabric.Canvas를 할당해주고 드래그 이벤트에 사용될 shapeTarget, shapeMode, drawing, startX, startY도 선언한다
생성될 혹은 생성된 shape의 선굵기, 색상을 변경하기위한 strokeWidth, color도 선언해준다
fabric object의 옵션 내부에서는 stroke, fill으로 각각 나뉘어있지만 여기서는 가독성을 위해 color 객체 안에 넣어두었다
생성에는 fabirc의 Rect, Ellipse, Triangle, IText 클래스를 사용하지만 이는 모두 fabirc의 Obejct 클래스가 확장된 것이므로 드래그시 그려질 대상인 target의 타입은 fabric.Object가 된다
http://fabricjs.com/docs/fabric.Rect.html
JSDoc: Class: Rect
List of attribute names to account for when parsing SVG element (used by `fabric.Rect.fromElement`) keeps the value of the last hovered corner during mouse move. 0 is no corner, or 'mt', 'ml', 'mtr' etc.. It should be private, but there is no harm in using
fabricjs.com
Method
objectLock
그리기중에 객체의 움직임을 제한해줄 objectLock 메서드
  objectLock(isLock: boolean) {
    canvas.discardActiveObject()
    canvas.forEachObject((o) => {
      o.hasBorders = o.hasControls = o.selectable = !isLock
      o.hoverCursor = isLock ? 'default' :'move'
    })
    canvas.requestRenderAll()
  }
함수가 호출했을때 augment는 isLock이 boolean으로 전달되고 canvas.forEachObject 함수를 활용하여 모든 객체를 잠궈준다
이때 reset메소드에서 생성된 대상을 setActiveObject() 후 requestRenderAll()을 하게되면 지연이 발생하여 객체들의 selectable = false를 하여도 반영이 되지 않을 수 있다

objectLock을 호출하기 직전에 canvas.discardActiveObject()함수를 호출하여 모든 activeSelect를 제거하도록하자
	o.hasBorders = o.hasControls = o.selectable = true // 선택가능
	o.hasBorders = o.hasControls = o.selectable = false // 선택불가능
forEachObject함수의 매개변수 별 변동되는 값은 위와 같지만 isLock: true가 전달되면 잠그고 isLock: false가 전달되면 풀어야 하기 때문에 혼동을 방지하고자 o.hasBorders = o.hasControls = o.selectable = !isLock으로 작성한다
커서는 isLock = true면 default로 아니면 move로 변경한다
reset
클래스를 초기화해줄 reset 메소드
reset 메소드는 추후 mouse:up 이벤트에서도 활용할 수 있게 작업하자
// class Shape {
  reset () {
    this.shapeMode = false
    this.shapeTarget = null
    this.drawing = false
    this.startX = 0
    this.startY = 0
    this.objectLock(false) // 선택 직전에 호출
    if (this.target) {
      // 타겟이 있는경우 모든객체 active 해제
      const result = this.canvas.getObjects().find(x => x == this.target)
      if (result) this.canvas.setActiveObject(result)
      this.canvas.requestRenderAll()
    }
    this.target = null
    this.canvas.selection = true
  }
shapeMode 종료, shapeTarget초기화, drawing종료 해주고 새로 드로잉할때 좌표가 튀는 것을 방지하기 위해 startX,Y도 초기화해준다
이전에 objectLock함수 시작부분에 canvas.discardActiveObject()로 모든 activeSlect를 삭제하였기 때문에 선택 활성화 직전에 호출해준다
그리고 종료 시점에 그리기 대상이 남아있는 경우 캔버스에서 find하여 대상을 선택해준다
추가된 대상만 재 랜더링 하기위해 requestRenderAll()을 호출한 뒤 target을 초기화하고 this.canvas.selection = true로 캔버스를 선택 가능한상태로 변경해준다
setShape
생성할 객체를 지정할 setShape 메소드
// class Shape {
  setShape (name: ShapeTarget) {
    this.shapeMode = true
    this.canvas.selection = false
    this.shapeTarget = name
    const options = {
      strokeWidth: this.strokeWidth,
      stroke: this.color.stroke,
      fill: this.color.fill,
    }
    if (name == 'rect') this.target = new fabric.Rect(options)
    if (name == 'ellipse') this.target = new fabric.Ellipse(options)
    if (name == 'triangle') this.target = new fabric.Triangle(options)
    if (name == 'star') this.target = new fabric.Polygon(polygonPointArray.star, options)
    if (name == 'text') this.target = new fabric.IText('Doble Click Edit text', options)
    this.objectLock(true)
  }
메소드 호출시 이벤트 감지를 위해shapeMode = true로 바꿔주고 canvas.selection = false로 바꿔 캔버스 선택을 비활성화 해준다
무엇을 그리는지에 따라서 이후 계산하는 값이 다르기 때문에 shapeTarget = name으로 변경시켜주자
이때 name은 앞서 선언된 type ShapeTarget이다
이후 기본 옵션인 strokeWidth, stroke, fill을 options 객체로 만들어주고 각각 class에 속성도 할당해준다
이때 Polygon은 기본 paramter로 Array<points>를 전달해야하고
http://fabricjs.com/docs/fabric.Polygon.html#initialize
JSDoc: Class: Text
keeps the value of the last hovered corner during mouse move. 0 is no corner, or 'mt', 'ml', 'mtr' etc.. It should be private, but there is no harm in using it as a read-only property. Type: Inherited From: Default Value: Source: Reference to a context to
fabricjs.com
IText는 string을 전달해야한다
http://fabricjs.com/docs/fabric.Text.html#initialize
JSDoc: Class: Polygon
List of attribute names to account for when parsing SVG element (used by `fabric.Polygon.fromElement`) keeps the value of the last hovered corner during mouse move. 0 is no corner, or 'mt', 'ml', 'mtr' etc.. It should be private, but there is no harm in us
fabricjs.com
Polygon은 앞서 선언한 polygonPointArray.star를 전달하고 IText는 임의문구를 전달한다 여기서는 'Doble Click Edit text'를 전달하였다
그 후 objectLock으로 객체를 잠궈준다
drawShape
마우스가 클릭되었을때 객체그리기를 할 drawShape메소드
  drawShape (options: fabric.IEvent<MouseEvent>) {
    // 객체 그리기
    if (this.target) {
      // 시작점 좌표 설정
      this.target.left = this.startX = options.pointer?.x || 0
      this.target.top = this.startY = options.pointer?.y || 0
      this.canvas.add(this.target)
    }
    // 드로잉 켜주기
    this.drawing = true
  }
drawShape는 canvas에서 mouse:down 이벤트가 일어나면 fabric.IEvent<MouseEvent>를 전달하고,
해당 이벤트가 전달 되었을때 생성된 shape의 left값과 top값은 마우스 클릭한 지점이므로 startX, startY에 할당해준다
그리고 setShape에서 this.target에 할당한 shape를 캔버스에 추가해준다
드래그로 shape를 그릴 것 이기때문에 mouse:down은 유지될 것이며 drawing = ture로 변경하여 마우스 이동의 감지를 할 수 있게하자
updateShape
마우스 이동시 객체를 업데이트할 updateShape메소드
  updateShape (options: fabric.IEvent<MouseEvent>) {
    if (this.drawing && this.target) {
      const pointer = this.canvas.getPointer(options.e);

      // 마우스 포인터가 시작점보다 작으면 object 위치보정
      if(this.startX > pointer.x) {
        this.target.set({ left: Math.abs(pointer.x) });
      }
      if(this.startY > pointer.y) {
        this.target.set({ top: Math.abs(pointer.y) });
      }

      const width = Math.abs(this.startX - pointer.x)
      const height = Math.abs(this.startY - pointer.y)
      if (this.shapeTarget == 'rect' || this.shapeTarget == 'triangle') {
        // 사각형이나 삼각형 또는 텍스트인경우
        this.target.set({
          width: Math.abs(width),
          height: Math.abs(height)
        });
      }
      if (this.shapeTarget == 'ellipse') {
        // 원인경우
        const ellipse = this.target as fabric.Ellipse
        ellipse.set('rx', width / 2)
        ellipse.set('ry', height / 2)
      }

      if (this.shapeTarget == 'star' || this.shapeTarget == 'text') {
        // 커스텀 도형인경우 scale로 조정
        const scaleX = width / (this.target.width ?? 1)
        const scaleY = height / (this.target.height ?? 1)
        this.target.set({
          scaleX: Math.abs(scaleX),
          scaleY: Math.abs(scaleY),
        });
      }
    }
    this.canvas.requestRenderAll()
  }
updateShape는 mouse:move 이벤트일때 options: fabric.IEvent<MouseEvent>를 전달한다
이때 실시간으로 shape 값을 업데이트하여 드래그를 구현하도록 하자
drawing = true일때 target이 있다면 캔버스에서 이벤트의 현재 이벤트 포인트좌표를 가져온다
이때 pointer.x 또는 pointer.y가 시작지점보다 값이 낮을 수 있는데 그러면 아래와 같이 shape가 마우스를 따라오지 않게된다

이점을 보완하기 위해 값이 낮다면 각각 left와 top을 재설정해주고 음수일 수 있기 때문에 Math.abs() 를 활용하자
그 후 shape의 width와 height는 각각 start - pointer로 해준다
이때도 값이 음수가 될 수 있는데 그렇게되면 pointer가 음수일때와 반대 결과가 되어버린다

위와 동일하게 Math.abs()를 활용하여준다
이후에 fabric.Object.set()함수를 활용하여 값을 할당해주는데
shapeTarget == 'rect' || shapeTarget == 'triangle'사각형 혹은 삼각형일 경우에는 width와 height를
shapeTarget == 'ellipse'원형인경우에는 width와 height를 절반으로 나눠서 반지름값인 rx와 ry를 할당해주고
shapeTarget == 'star' || shapeTarget == 'text' 폴리곤 또는 text인경우 width와 height값을 변환하면
좌표값으로 이루어져 있기 때문에 위와같이 객체의 activeSelect값을 찾을 수 없어지는 문제가 발생한다
그렇기에 scale값을 계산해야 하는데 단순하게 앞서 계산한 width 또는 height값과 객체 자체의 width 또는 height값으로 나눠주면된다
이때 typescript는 target의 width 또는 height값이 있는지 알 수 없기 때문에 Nullish coalescing operator를 사용하여 기본값은 1로 할당한다
https://developer.mozilla.org/en-US/docs/Web/JavaScript/Reference/Operators/Nullish_coalescing
Nullish coalescing operator (??) - JavaScript | MDN
The nullish coalescing (??) operator is a logical operator that returns its right-hand side operand when its left-hand side operand is null or undefined, and otherwise returns its left-hand side operand.
developer.mozilla.org
그리고 모든 작업이 완료되면 캔버스를 다시 랜더링해준다
changeStrokeWidth
선굵기를 변경하는 메소드
이제 class의 선굵기와 객체를 변경하는 메소드와 선택된 객체에 해당 값을 적용하는 메소드를 생성해주자
  changeStrokeWidth (strokeWidth: string) {
    this.strokeWidth = Number(strokeWidth) || 1
    this.updateObject({strokeWidth: this.strokeWidth})
  }
changeStrokeWidth 메소드는 input range의 event.target.value를 전달받는데 해당값을 string으로 전달된다 그렇기에 Number로 변환하여 할당해준다
이후 updateObject 메소드에 object 형식으로 전달한다
changeColor
선 색깔을 변경하는 메소드
  changeColor (type: 'fill'|'stroke', color: string) {
    if (type == 'fill') {
      this.color.fill = color
      this.updateObject({fill: this.color.fill})
    } else {
      this.color.stroke = color
      this.updateObject({stroke: this.color.stroke})
    }
  }
changeColor는 type과 color를 전달받는데 type은 'fill'|'stroke'으로 color는 hex color code가 전달되는데 if 체크를 하여 각color.fill에 할당한다
이후 updateObject 메소드에 object 형식으로 전달한다
updateObject
이미 생성된 객체를 업데이트하는 메소드
  updateObject (option: ObjectOptions) {
    const activeObjects = canvas.getActiveObjects()
    if(activeObjects.length > 0) {
      activeObjects.forEach((o) => {
        o.set(option)
      })
      this.canvas.requestRenderAll()
    }
  }
updateObject의 option은 interface ObjectOptions로 전달받게 되는데 이후 canvas.getActiveObjects() 함수를 사용하여 현재 선택된 객체를 가져온다
가져온 객체가 있을경우 activeObjects.forEach()함수를 사용하여 객체에 할당해준다
작업이 완료되면 캔버스를 다시 랜더링해준다
Reference
이제 클래스 내부 필드와 메소드는 모두 선언하였고 추가적으로 사용될 변수와 함수 그리고 canvas 이벤트와 html을 작성하여 마무리해보자
html
<div>
  <button type="button" onclick="shape.setShape('rect')">rect</button>
  <button type="button" onclick="shape.setShape('triangle')">triangle</button>
  <button type="button" onclick="shape.setShape('ellipse')">ellipse</button>
  <button type="button" onclick="shape.setShape('star')">star</button>
  <button type="button" onclick="shape.setShape('text')">text</button>

  <input type="range" min="1" max="50" step="1" value="1" onchange="shape.changeStrokeWidt(event.target.value)"/>

  <input type="color" onchange="shape.changeColor('fill', event.target.value)"/>
  <input type="color" onchange="shape.changeColor('stroke', event.target.value)"/>
</div>
<div id="canvas-container">
  <canvas id="canvas" width="1280" height="720">
</div>
html은 다음과 같이 작성하고 setShape는 onclick이벤트를 input은 onchange이벤트로 각각 클래스에 메소드를 호출해준다
input에 addEventListener를 추가하여 값이 변할때마다 업데이트 해줘도된다 이 포스팅에서는 onchange만 사용한다
https://developer.mozilla.org/ko/docs/Web/API/HTMLElement/input_event
HTMLElement: input event - Web API | MDN
input 이벤트는 <input>, <select> 및 <textarea> 요소의 value 속성이 바뀔 때마다 발생한다.
developer.mozilla.org
EventListener
class는 호이스팅이 안되기 때문에 작성후 인스턴스를 생성해준뒤 canvas를 전달하여 초기화한다
const shape = new Shape(canvas)

canvas.on('mouse:down', (options) => {
  if (shape.shapeMode) shape.drawShape(options) // 객체 그리기 시작
})

canvas.on('mouse:up', (options) => {
  if (shape.shapeMode) shape.reset() // 객체그리기 종료후 리셋
})

canvas.on('mouse:move', (options) => {
  if (shape.drawing) shape.updateShape(options) // 객체 그리기 시작
})
그리고 앞서 설명한 canvs의 eventListener를 각각 추가해주자
mouse:down시에 최초 시작점을 할당하기 위해shape.drawShape(options)를 호출하고
mouse:up이벤트에는 드로잉을 종료하기 위해shape.reset()를 사용하여 초기화를 해준다
mouse:move시에는 드로잉을 감지하기 위해shape.updateShape(options)를 호출해준다달아준다
이제 canvas에 객체를 그릴 수 있게 되었다!
동작되는 예제는 아래를 참고
'fabric.js' 카테고리의 다른 글
| fabric.js Image Editor - (4) filter (0) | 2023.03.31 |
|---|---|
| fabric.js Image Editor - (3) Crop (0) | 2023.03.20 |
| fabric.js Image Editor - (1) import image (1) | 2023.03.19 |


댓글 영역